Our official Social Media welcome to #vanlife came from part.time.nomad in response to this photo on Instagram. https://www.instagram.com/p/BQ_s1vPgNtf/?taken-by=bgnout&hl=en
Whether it was in reference to my anecdote of the task taking twice as long or just the fact that we have a van, either way, we're beginning our own adventure and learning the lessons of the road.
Here's the top five things we've learned:
1) Keep it Simple:
If given a choice of doing a task the hard way or the easy way, pick the easy one. There's no reason to make a task more difficult or frustrating. Yes, you will come across your own unique challenges, but keep it simple and you'll keep the project a hobby instead creating work. We learned this lesson while making templates for the walls. It was such a simple task and we made it the most difficult. Here's a nugget of wisdom on converting a van, ANY VAN: If you're making templates for the walls, use cardboard. Sounds
simple, right? Yes, keep your build simple, especially if this is your
first van build or building isn't you're full-time job. Heed our advice: Cardboard for templates, not paper. You will thank me later.
2) Take Tea Breaks:
While living abroad, I learned that tea is more than just a drink. The Chinese taught me the ceremony of the leaf. The English taught me that work breaks always included a cup of tea, a biscuit and a chat with a colleague. For van builds, tea breaks are not about ceremonies or communion, it's about taking a break, relaxing and putting your tasks into perspective. Building a tiny house on wheels is hard work, mentally and physically. So drink tea, rest, and rejuvenate. We took tea breaks along the way. Usually when we were making something easy really difficult. We made a cup of tea, thought about the problem, and watched Youtube videos about van builds. Youtube has been our virtual Bible. There are a ton experienced people on the Internet. Seek their advice with a cup of tea in hand.
3) Be Humble:
Everything takes longer than anticipated. If you think the job will be easy, well that's usually the task that is
the biggest challenge. Be humble. Mistakes will happen. It won't be perfect. Enjoy the process. Learn as you build. Aristotle said, "Pleasure in the job puts perfection in the work." Remember you're making and designing your OWN adventure mobile. How cool!
4) Have a Plan:
A van build out is just like any other life project. We approached this build like we do most task in life. First, it starts with a dream. Then we create a google spreadsheet. Yes, we are nerds, we communicate a lot by spreadsheets. While we are two novice van builders, we take comfort in plans and To-Do Lists. A plan puts any daunting task into perspective. Next, we put the tasks on the calendar, so each day we know where to start instead of looking at the empty shell and asking, "Where do we begin?" When making a plan include a goal for completion. We bought the van because of our next scheduled trip, six weeks from the purchase date, we are driving to Arizona to ride motorcycles through the Joshua Tree Desert. The van won't be completed, but it will be usable. We're highly motivated. To recap: Make a plan. Make it happen.
5) Create a Mantra:
All you need is a few simple words to keep you motivated. Remember Dory? The fish? She has one, "Just keep swimming." Repeating something positive in your head will keep you swimming through the build. Our Manta: Get it done. This has been our mantra in our marriage, and it serves us during the build too. We love project managing, so when we get the opportunity to tackle any new task, we "Get It Done."
When approaching your van build, approach it like your life, but better because it is #vanlife.
Tuesday, February 28, 2017
Monday, February 27, 2017
Beginning the finishing
 |
| View of back side of fan with 2x2 and 1x2 firing |
 |
| Front of fan with 2x2 firing strip |
Unfortunately I didn't take any photos of the result. The adhesive had 4 days to set before I began stapling into the nailers. I was really worried about this approach but a you can see from these photos, it really turned out ok.
You can see the nailers in these photos. I did have to add a second strip of 1x2 to the rear nailer to take up some additional space and give me a place to attache the four short strips of paneling between the back of the van and the back of the fan.
 |
| Finished ceiling with strips of leftover panelling ripped down to be used to cover staples |
We pulled several sections of rope through 1 7/8" holes drilled in the ceiling panels which we will run wires out of for the lighting. We pulled the rope sections through once we had several rows of panelling installed beyond the row where the lights will be installed to give the ceiling enough strength
 |
| 1 7/8" holes I drilled to pull wire through for surface mount LED puck lighting |
to drill through. The tongue and groove pine is very light and flexible, which is great for the van because it can flex as the chassis moves around, but its not great for drilling into.
The paneling was relatively easy to install once we worked around the fan. We had to cut notches for the panels that would adjoin the fan shroud. We choose to use a pneumatic staple gun to attache the panels to rib nailers, which turned out great. The stapler was more than adequate and the staples were easy to remove when we screwed up, which happened a few times. To make sure the panels stuck to the ribs, we applied a layer of liquid nails to the ribs as we attached the panels.
Once all the panels were installed, I ripped the tongue and groove edges off a few leftover pieces to use as a finishing board to cover the staples in the rib sections, here are a few photos:
 |
End of rib finishing.
|
 |
| Front passenger corner |
 |
| Front drivers side corner |
 |
| Finished view looking towards the back of the van |
 |
| View of the ropes we pulled through so we can pull wire for lighting. |
Sunday, February 19, 2017
The first challenges
The day started out with a trip out to HD & Lowe's in the newly insulated van. It was noticeably quieter but still getting some road noise. Could be from the doors, which we still need to insulate. I am picking up some more insulation tomorrow to finish off the door panels and add some to the side channels.
Today was mostly prep work for installing the ceiling. I hung 1x4 nailers on the 3 main ribs, a 2x2 on the aft end and a 1x2 on the front. The front and aft nailers did give me some headache. Neither could be secured upwards into a rib, as there isn't one in the rear and up front the obvious rib to use is where the factory headliner for the over cab storage is secured. I asked for some guidance on promasterforum.com and Gary, who's website is a really great tool, suggested I look at his installation photos. It doesn't quite go all the way across but I think it will do... fingers crossed. I drilled through the 2x2 into the back channel that runs above the doors. I had to make a notch for the rear door cargo light but my cheapo harbor freight jigsaw did the trick.
The front nailer took a little more thought and several attempts. Initially I thought I would have to bevel the edge to match the edge of the rib, but I don't have a saw for that, at least I didn't think I would be able to pull it off. So I cut a 1x2 to length and went about attempting to hang it. Initially I tried screwing the ends in to the ends of the rib, which sorta worked but the mid section was hanging freely and I wasn't happy with how insecure it felt. So I cut the length in two, which made fitting the bend in the ceiling much easier and I was able to secure it fairly squarely to the rib by drilling through the width of the board into the predrilled holes in the rib. Its not super pretty but it will do the trick of securing the ends of the ceiling boards.
The next challenge was how to secure anything between the back of the fan and the back of the van. Now I understand why several people suggested framing around the fan opening... live and learn. I thought through several scenarios, including removing the fan and building a frame but settled on cutting a piece of hardboard to fit between the last rib and the aft nailer. I'll fix it in place then panel over the top, and just glue the few pieces of paneling between the rear of the fan and the aft nailer. Its not perfect but it will work. The paneling is very flexible, at 3/16", which should make installation easier.
I picked up a pneumatic stapler and a variety of staples. I am hoping it will be sufficient for securing the panels along with some adhesive. Rajo spent
the day prepping the paneling with a water based Poly coat. I didn't want to use oil based due to the off gassing and the water based stuff dries pretty quickly sans odor. If all goes well, tomorrow I'll finish insulating, hang the rear panel around the fan, and start thinking about the installation of the ceiling panels.
 |
| Aft nailer in place |
The front nailer took a little more thought and several attempts. Initially I thought I would have to bevel the edge to match the edge of the rib, but I don't have a saw for that, at least I didn't think I would be able to pull it off. So I cut a 1x2 to length and went about attempting to hang it. Initially I tried screwing the ends in to the ends of the rib, which sorta worked but the mid section was hanging freely and I wasn't happy with how insecure it felt. So I cut the length in two, which made fitting the bend in the ceiling much easier and I was able to secure it fairly squarely to the rib by drilling through the width of the board into the predrilled holes in the rib. Its not super pretty but it will do the trick of securing the ends of the ceiling boards.
 |
| Front three nailers in place |
 |
| Rear section hardboard panel |
 |
| Rajo prepping the panels |
I picked up a pneumatic stapler and a variety of staples. I am hoping it will be sufficient for securing the panels along with some adhesive. Rajo spent
the day prepping the paneling with a water based Poly coat. I didn't want to use oil based due to the off gassing and the water based stuff dries pretty quickly sans odor. If all goes well, tomorrow I'll finish insulating, hang the rear panel around the fan, and start thinking about the installation of the ceiling panels.
Snug as a Bug in a Rug
 |
| View from the back |
 |
| View from the slider |
 |
| View of ceiling |
 |
| Great Stuff in ribs |
 |
| Nailer & Sound dampening |
 |
| First Panel |
 |
| Sound dampening on wheel well |
 |
| Rajo! |
Friday, February 17, 2017
A room with a view


I looked at the two most common options, CR Laurence and Motion Windows. I actually like the look of the Motion windows but the 6-8 week lead time turned me off. I called my local van conversion guy to see what he had to offer. Turns out he is a CR Lawrence dealer and quoted me a better price than what I was seeing online and he could have it on site within a week so I went with that option. After thinking about it and reading a few blogs and forums on the installation, I decided that it was worth the $200 he would charge me to install the window. The window install being the only job that I really didn't feel confident doing, the risks of screwing up were just too high.
All tolled, the install was $750 and I am quite happy as I was expecting upwards of $900 installed. Plus the installer was happy to answer some additional questions about insulation and wiring and gave me a great tip on flooring. He suggested using garage roll out flooring instead of what I had planned, linoleum. A quick google search revealed that there are many options out there. American Floor Mats has several options and may cut to length. I also searched eBay for roll flooring and found many options but only in 4ft widths, which would mean a seam that I am trying to avoid.
Wednesday, February 15, 2017
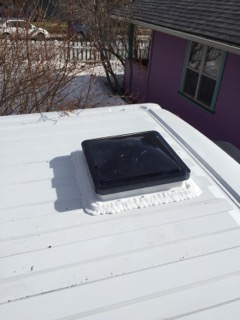
First Cut
A week after purchase, Cujo decides where to place the fan. Honestly, I was a little worried about cutting a hole in the roof of the van. Luckily, Cujo did his research and knows how to follow the lines.
 |
| Measuring and drawing the lines to cut. |
 |
| Cujo is making the cut! |
 |
| Success! Bugger has a hole in the roof. |
Next step, is to install the fan into the whole and test:
- Adhere the Impact3D roof adapter to the roof of the van with 3M Window Weld and let cure for 12 hours
- Set the fan body into the hole and drill pilot holes through the adapter and roof for the screws
- Add a layer of butyl tape around the perimeter of the fan body
- Screw the body into the adapter and roof.
- Cover the adapter and lip of fan body with Dicor Self Leveling Sealant.
Dicor Self Leveling Sealant applied - Test the van!
Monday, February 13, 2017
Introducing BGN OUT Van - From Packy to Bugger
 |
| "Packy" the 2008 Honda Element |
 |
| Close quarters |
 |
| We are ready for adventure |
For all of its challenges we made "Packy" work. That was until we got our puppy. She's a smallish, Springer spaniel mix so she doesn't take up a lot of room, just enough that with her, the 12 pound mini-dauschund and the big yellow Labrador, the human's didn't have much space to sleep on the last outing to Lassen National Park in Northern California. That's right, you can fit two adults and 3 dogs into the back of a Honda Element camper, it's just not very comfortable :(. All along we had been talking about options for the future. I was pretty set on a pickup truck with a slide in camper, my wife, a traditional RV. We looked at both over the course of last summer and realized by the end that neither was what we really wanted.
Our requirements weren't fancy:
- a comfortable, preferably queen size bed.
- a place to store our gear inside.
- a place for our pups to stay for a couple of hours during mtn bike rides.
- a ready to go stove top for boiling water in the morning (especially when its 17F).
- a table top to sit at, eat on when the weather is inclement.
- capable of towing a small trailer with motorcycles or bicycles or both.
 |
| From a 2 slice to a 4 slice bagel toaster |
case but quickly figured out they were cost prohibitive, so we looked at Ford, Nissan and Dodge offerings and ultimately settled on the RAM ProMaster. The ProMaster is similar in look to a Sprinter, but 6" wider across the back, making it wide enough to support a queen size mattress cross ways, which was a huge factor. It has front wheel drive, making it much safer to drive in our snowy climate in the winter. The ProMaster is a rebranded Fiat Ducato, which has been in production for quite a while but only introduced to the North American market in 2014. We tried to find a lower milage used vehicle, but being such a newly introduced model, all we found were 100,000+ mile, low top models. We really wanted the high top, it measures 7ft from floor to ceiling, so standing up is no problem. The ProMaster is reasonably affordable, priced between the Ford Transit and the Nissan NV models. It comes in two lengths, high or traditional low top and gas or diesel and is ready to build out if you can find one that hasn't had racks or a bulkhead installed at the factory.
 |
| Bugger the 2017 Ram Promaster 1500 High Top |
So here we are, a giant empty metal box and 6 weeks until our next vacation. Let's get busy!
Subscribe to:
Posts (Atom)